Accepting wedding invitation orders for 2025 events
Main Menu
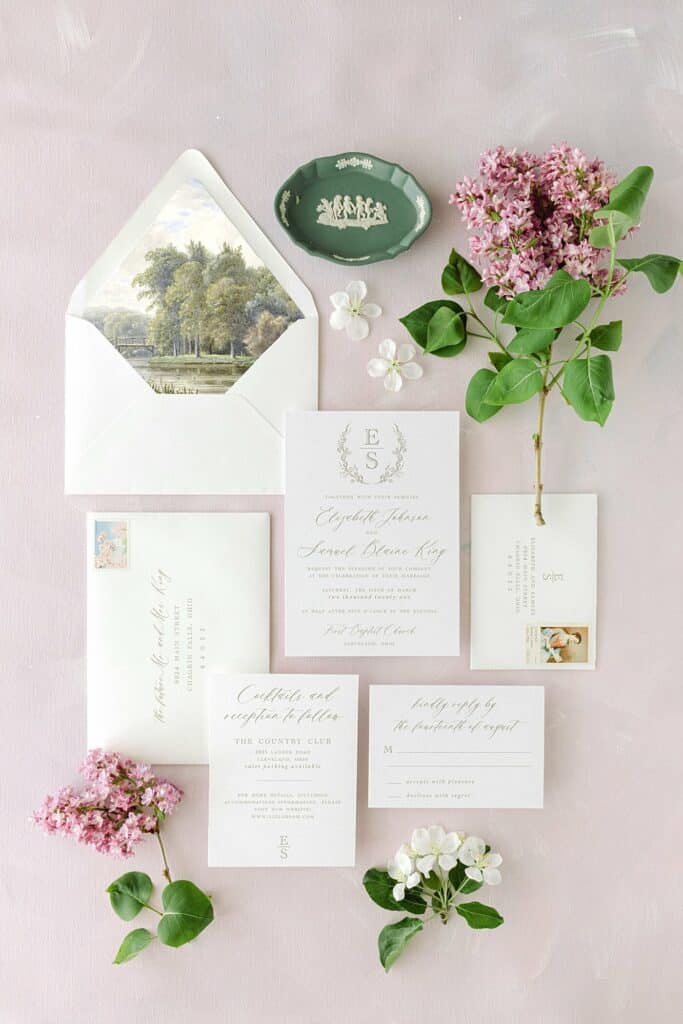
Wedding Stationery WELCOME GUIDE
Thank you for your order! I’m thrilled to get started on your wedding invitations.
Thank you for trusting me with this important detail of your wedding day. Included in this Welcome Guide is a guest address template, process timeline and a list of frequently asked questions. Please review these documents carefully and reach out if you have any questions. My goal is to make this process as fun and smooth as possible for you.
I’m here to help!
Design & Print Process
Please review the design process and production timeline below.
| Step | Details | Timeframe |
|---|---|---|
| Your order is placed! | Yay! | |
| Invitation Details Submitted | All invitation details are submitted via your online Collection order or the Details Questionnaire for Custom orders. This includes your guest address list for envelope printing. Please see below for the template if needed. | Please note that your design process will not start until we receive your guest address list and all invitation details. |
| Design Proof #1 | We get to work on your first design proof! This proof will arrive via your Honeybook portal and will include a PDF and JPG version of all the pieces in your invitation suite. | 7-10 Business Days |
| Proof #1 Revision Requests | Revisions to your design proof may be submitted via the online form within your proof file. Please submit all revision requests in this form. | Please submit your revision requests within 3 business days. |
| Design Proof #2 | Once you submit your revision requests, we get started on your next proof! Your second proof will be delivered via your Honeybook portal and email. | 3 business days |
| Proof #2 Revision Requests | Final revisions may be submitted at this time. Please note that collection invitations include 2 proofing rounds only. If you would like additional rounds, they will be billed at $50 per round. | Please submit your revision requests within 3 business days. |
| Final Proof & Print Approval | Your final invitation and envelope proofs are sent to you for one last check and print approval. You will complete a print approval form before anything is sent to print! | 1-3 Business Days |
| Printing | Once you approve, your invitation suite will be sent to print and production! | Digitally printed suites are ready to ship to you within 10-15 business days. Suites with letterpress or foil printing require 5-7 weeks for printing. |
| Your invitations are shipped to you! | All invitation suites are shipped via UPS Ground. You will receive an email with tracking information as soon as your order ships! | Approximately 2-5 business days (depending on location) |
Envelope Addressing
Guest address printing is included in all Custom & Collection invitation suites for your convenience. This enables you to simply assemble, stuff and mail your invitation suites when they arrive. There are a few guidelines and tips for submitting your address file.
TEMPLATE
If you have not already, please submit your guest addresses via the template below. You can download a copy of the Google Sheets template for you to edit.
PROOFING
The designed guest/recipient address file will be proofed with the rest of your order. If we do not receive the guest/recipient address excel file with your order, your order will be held until it is emailed to us. Your proofing timeline will not begin without this excel document. Please email your file via a link or an attachment to meghan@megmorrowdesign.com.
IMPORTANT
Please ensure that your guest list is 100% correct BEFORE submitting. Your envelopes will be included in the 2 rounds of proofing edits for your save the date or full invitation suite. A $50 fee will be invoiced separately for each additional round of proofing including name and address changes.
Please note we do not make changes to your guest list template if revisions are sent over. You will need to keep track of your changes for subsequent orders (for example save the dates and then invitation orders that follow).
A Few Tips
For Addressing
- The address template provided includes columns for name(s), street address, city and state, and zip code. If you need to add a line for apartment or unit number, please add an additional column.
- Please be sure to type out everything as you would like it to appear on your envelopes. For example, ‘and’ or ‘&’ sign and ‘Mr. and Mrs.’.
- Please spell out states, street, road, avenue, apartment, etc. unless you prefer to have the abbreviation printed instead.
- If zeros are disappearing from the beginning of your zip codes, change the contents of the excel cell to “Text” instead of numbers.
- Please feel free to reach out to us at meghan@megmorrowdesign.com if you have specific addressing questions!

How to Contact Meg
The best way to contact me is via email at meghan@megmorrowdesign.com
or through your Honeybook Client Portal.
Honeybook Client Portal
This portal is an online space to store all of our communication, proposals and files. All proofs will be sent via this portal. Please use this space for all communication once we start your project. Additional contacts such as wedding planners, fiancé’s or other important people can also be added to this portal to view and comment on communication and design proofs.
Office & Communication Hours
Mondays & Wednesdays: 1PM to 3PM
Tuesdays & Thursdays: 9AM to 3PM
Please allow 24-48 business hours for response.
Frequently
ASked Questions
Below are some of our most frequently asked questions, but feel free to schedule a time to chat with me if you have more! Design consults are a great way to get more information on options, pricing, timelines and advice on which suite may be best for your wedding style.
HOW LONG DOES THE ORDERING PROCESS TAKE? WHEN CAN I EXPECT MY ORDER TO SHIP?
Your wedding invitations should be ordered about 3 – 4 months before your wedding, giving you plenty of time to stamp, seal and mail to your guests. All Collection designs take 4-8 weeks to process depending on printing method and proofing time. Additional time is required for custom design orders (5-6 months from first point of contact to delivery), so make sure you’ve got plenty of time to get all the details perfect.
HOW DO YOU SHIP ORDERS? WHAT IF I AM LOCAL?
All orders are shipped via UPS or the best method available. Once shipped, you will receive your pretty package within 3-7 business days. Shipping is included in your price. If you are local, you may pick up your invitations at the MM Design Studio or delivery (within the Cleveland metro area) is available for a flat $50 charge.
WHEN SHOULD I SEND OUT MY SAVE THE DATES & INVITATIONS?
Save the Dates should be sent about 6 months before your big day. Your invitations should be sent 6-8 weeks prior to your wedding date.
HOW MANY REVISIONS ARE INCLUDED IN THE DESIGN PROCESS?
Collection pieces include TWO rounds of edits. Most pieces are edited to perfection using the allotted rounds, but if necessary, additional rounds of edits are $50 each. Custom Designed pieces include up to 4 rounds of edits, but I will work with you to get your design perfected as needed.
DO YOU OFFER RUSH ORDERS?
Digitally printed orders can be rushed for an additional $250. Rushed orders will ship 5 business days following the final approval of your suite proof. Please note, letterpress and foil printing cannot be rushed due to the nature of the printing process.
WHAT TYPE OF PAPER DO YOU USE?
All Digital Collection suites are printed on your choice of single-ply or double-ply Eggshell paper in Pure White or Soft White. All Letterpress and Foil orders are printed on Savoy Cotton paper in your choice of single-ply or double-ply Pure White or Soft White.
Assembling
your invitations
I’m so excited for your guests to see your invitations. to make the assembly and mailing process a bit smoother, i’ve put together this guide which will walk you through the steps necessary for assembling your entire suite and working with the post office to mail out your invitations. remember to make the process fun! gather your girlfriends, mom or sister, a bottle of bubbly, and get to work!
1. HELLO INVITATIONS!
Unbox your invitations and check each piece. Make sure everything looks perfect to you! Set aside the suite assembled for you and your photographer. You’ll want to keep one suite for your photographer to capture on your wedding day.
2. PREPARING FOR ASSEMBLY
For the most part, wedding invitations are assembled in size order, with each card placed face up and the largest card on the bottom. Start with the invitation card. Before you start stuffing envelopes, you’ll want to make sure all of the various wedding stationery pieces are in the proper order.
3. INVITATION SUITE ASSEMBLY
Place the wedding reception/details card face up on top of the invitation card. Place the remaining enclosure cards—i.e., map card or hotel accommodations card—face up on top of the reception/details card. Place the reply envelope—printed side-down—on top of the enclosure cards, with the envelope flap on the left. Then, insert the reply card under the envelope flap, face up so the printed side is visible. (Don’t forget to pre-stamp the reply envelope!)
You’ll want to put down any vellum jackets or silk ribbons first under the full suite so they can be wrapped around and/or tied.
4. INVITATION ENVELOPES
Insert the fully assembled invitation suite into the envelope. When the flap is opened, guests should be able to read the invitation as they take it out without having to turn the card.
5. SEALING
Use a double-sided tape roller to seal your envelope. Be sure to choose a permanent adhesive tape roller. Swipe on the top of your envelope flap, fold and press firmly to seal.
6. MAILING YOUR INVITATIONS
Before you mail your wedding invitations, bring a fully assembled set to the post office and ask them to weigh it so you know exactly how much postage you’ll need. Once all your envelopes have been stamped with sufficient postage, I recommend bringing them to the post office to be hand canceled (instead of dropping them in a mailbox)—this will reduce the risk of your invitations being damaged in the mail.
–
A FEW MORE TIPS:
Be sure to remove all nail polish before assembling your invitations. regular nail polish can transfer to light colored paper.
Don’t rush! make sure to leave at least 1-2 days to assemble and mail your invitations.
When ready to mail, take your assembled and sealed invitations to your post office in a cardboard box. Ask them to “hand cancel” each envelope. This prevents damage from running envelopes through their machine. They should be able to do this for you. Some post offices do charge for this service.
Please note: Meg Morrow Design is not responsible for how the postal service handles stationery
or the delivery of your invitations to recipients.
Celebrate your every day with us on the ‘gram »

Get the Guide:
Top 5 Invitation Questions Answered
Click below to download the answers to our most frequently asked questions! You’ll get the Top 5 guide and be the first to know about wedding and lifestyle trends, hosting tips and new Collection launches.
find your way around
services & products
© 2024 Meg Morrow Stationery (Meg Creative Design LLC) | ALL RIGHTS RESERVED | Terms and Conditions | Privacy Policy
Chagrin Falls, Ohio | Cleveland, Ohio | Naples, Florida | SW Florida